We all have encountered situations where the seller or service provider has asked us to quote the ‘Permanent Account Number (PAN)’ or provide a photocopy of PAN as a supporting document. The most common one being for opening a bank account. This is because, section 139A(5)(c) of the Income Tax Act has specified rules when a person is required to quote or give a PAN compulsorily.
Just like one needs to give PAN for opening a bank account, several translations as prescribed by law require you to mention the PAN on the documents. One such requirement is to display the PAN of the seller and the buyer on invoices of 2,00,000 or above.
In simple words, if you, as a seller, raising an invoice of 2,00,000 or more, it is compulsory for you to print your PAN along with the buyer’s PAN on the invoice as a separate field
Let’s discuss with an example.
Ganesh Traders, a dealer in hardware goods located in Maharashtra, supplies goods worth 2,50,000 to Maruthi Traders in Karnataka.
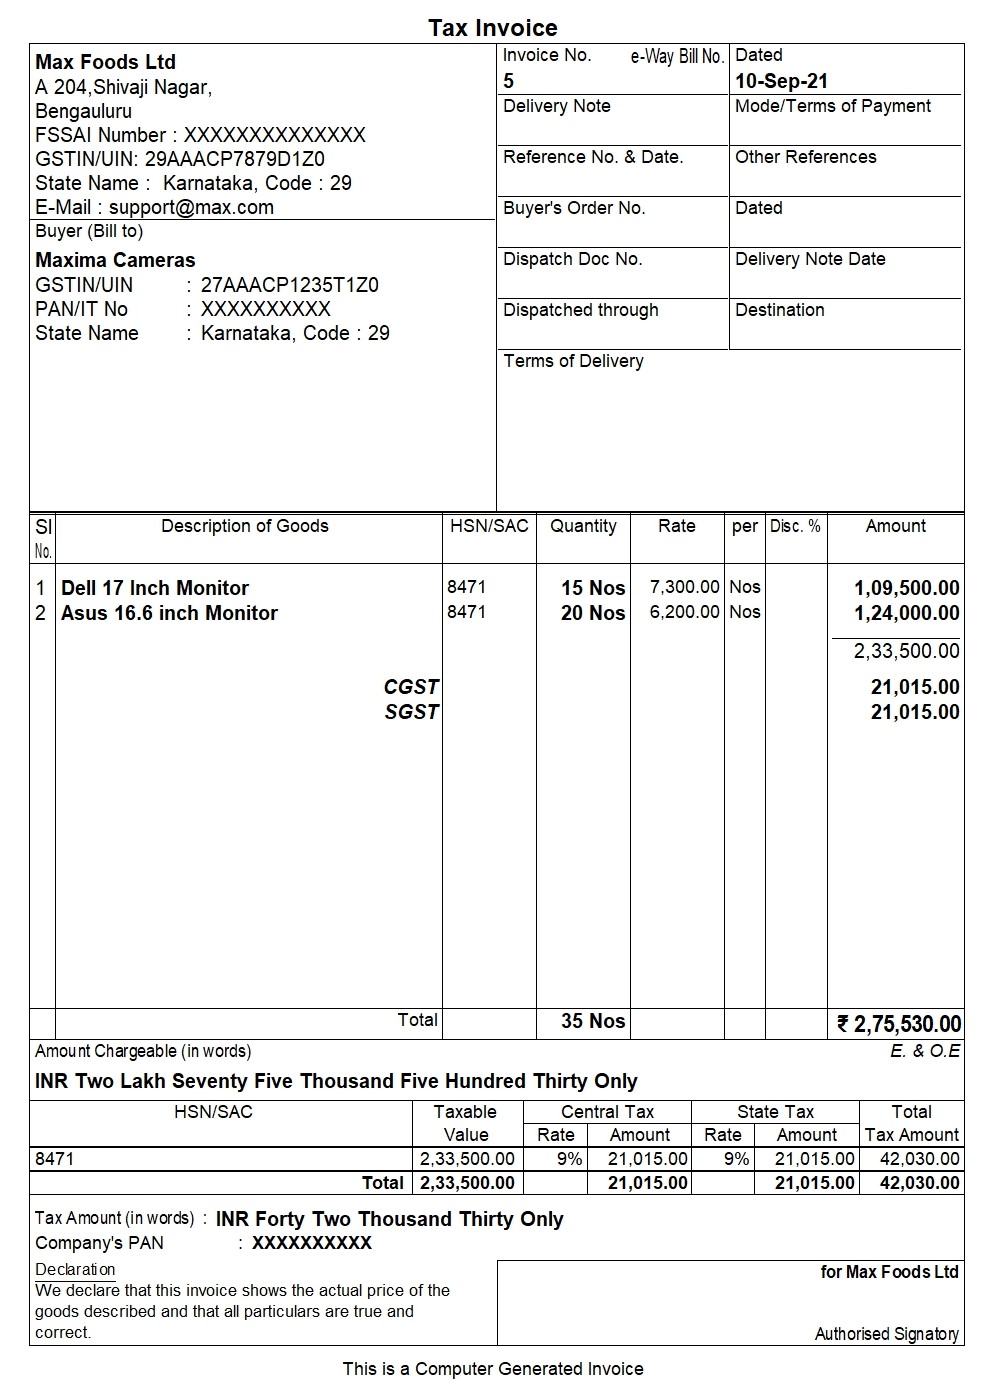
Here, Ganesh Traders should mention their PAN as well PAN of Maruthi Traders on the invoice. The PAN of both parties is to be printed in a separate field on the invoice.
| Generate e-Way bill Instantly Using TallyPrime | 5 Things You Can Do Using Save View Option in TallyPrime |
How to print PAN on invoices in TallyPrime
Using TallyPrime, you can easily configure the PAN of the company as well as the buyer. All you need to do is mention the PAN in company statutory details and the party ledger of the buyer. Once you specify, TallyPrime will automatically print the PAN on all the invoices. You can follow the below steps to configure and print PAN on the invoices
Company’s PAN configuration
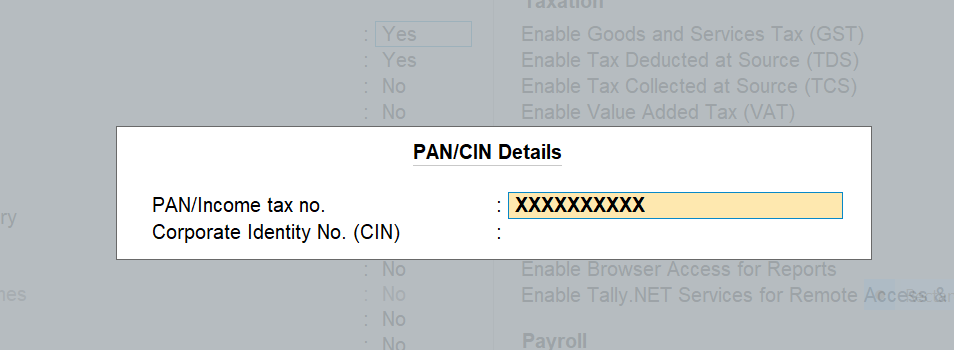
To configure the company’s PAN, navigate to ‘Features’ by pressing F:11 > Ctrl + I for More Details > PAN/CIN Details > Mention the PAN and accept the screen.
Party PAN configuration
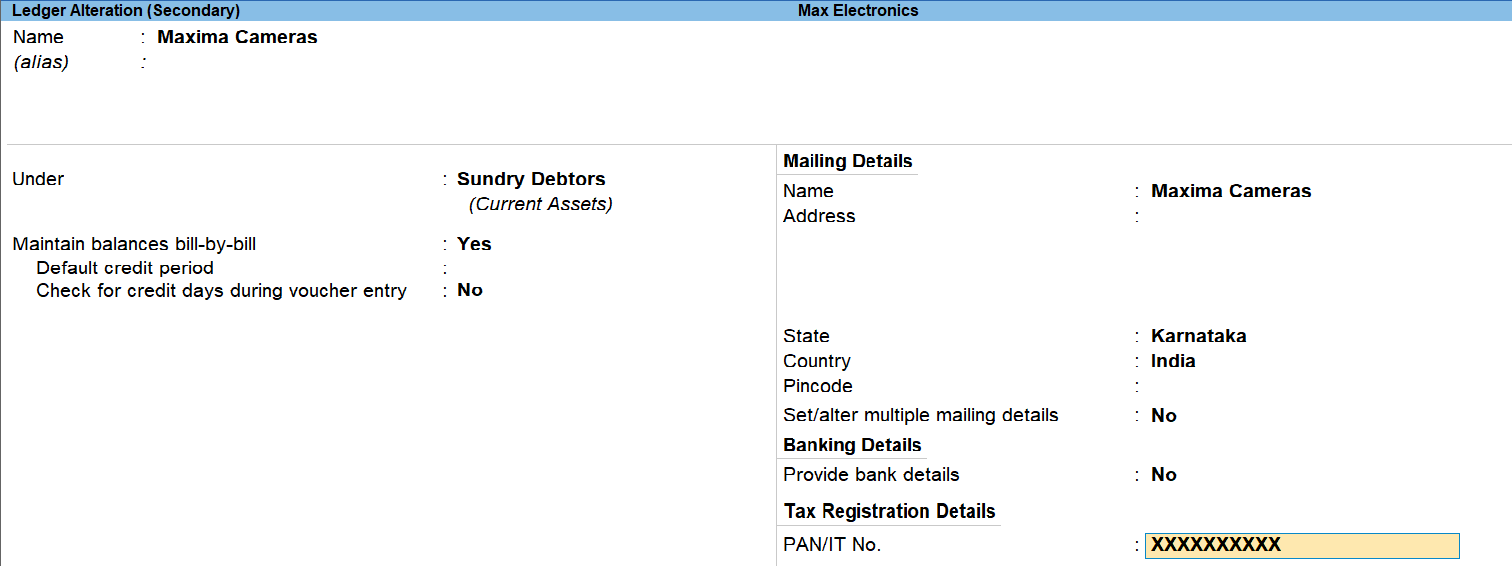
To provide buyers PAN details, navigate from Gateway of Tally > Alter > Ledger > Select the Party ledger > Mention the PAN and accept to save the changes.
Printing PAN on invoices
To Print pan on invoices, ensure ‘Shown PAN/Income Tax No’ is enabled for the company and party.

To enable, from sale invoice, press Ctrl + P for ‘Print Current’ > Configure > Type ‘PAN’ > Enable ‘Show PAN/Income Tax No. for the company and party ledger.
Invoice with PAN in TallyPrime
Print PAN on cash billing
If you are making cash sales and would like to print the PAN on invoices, you can follow any of the options below:
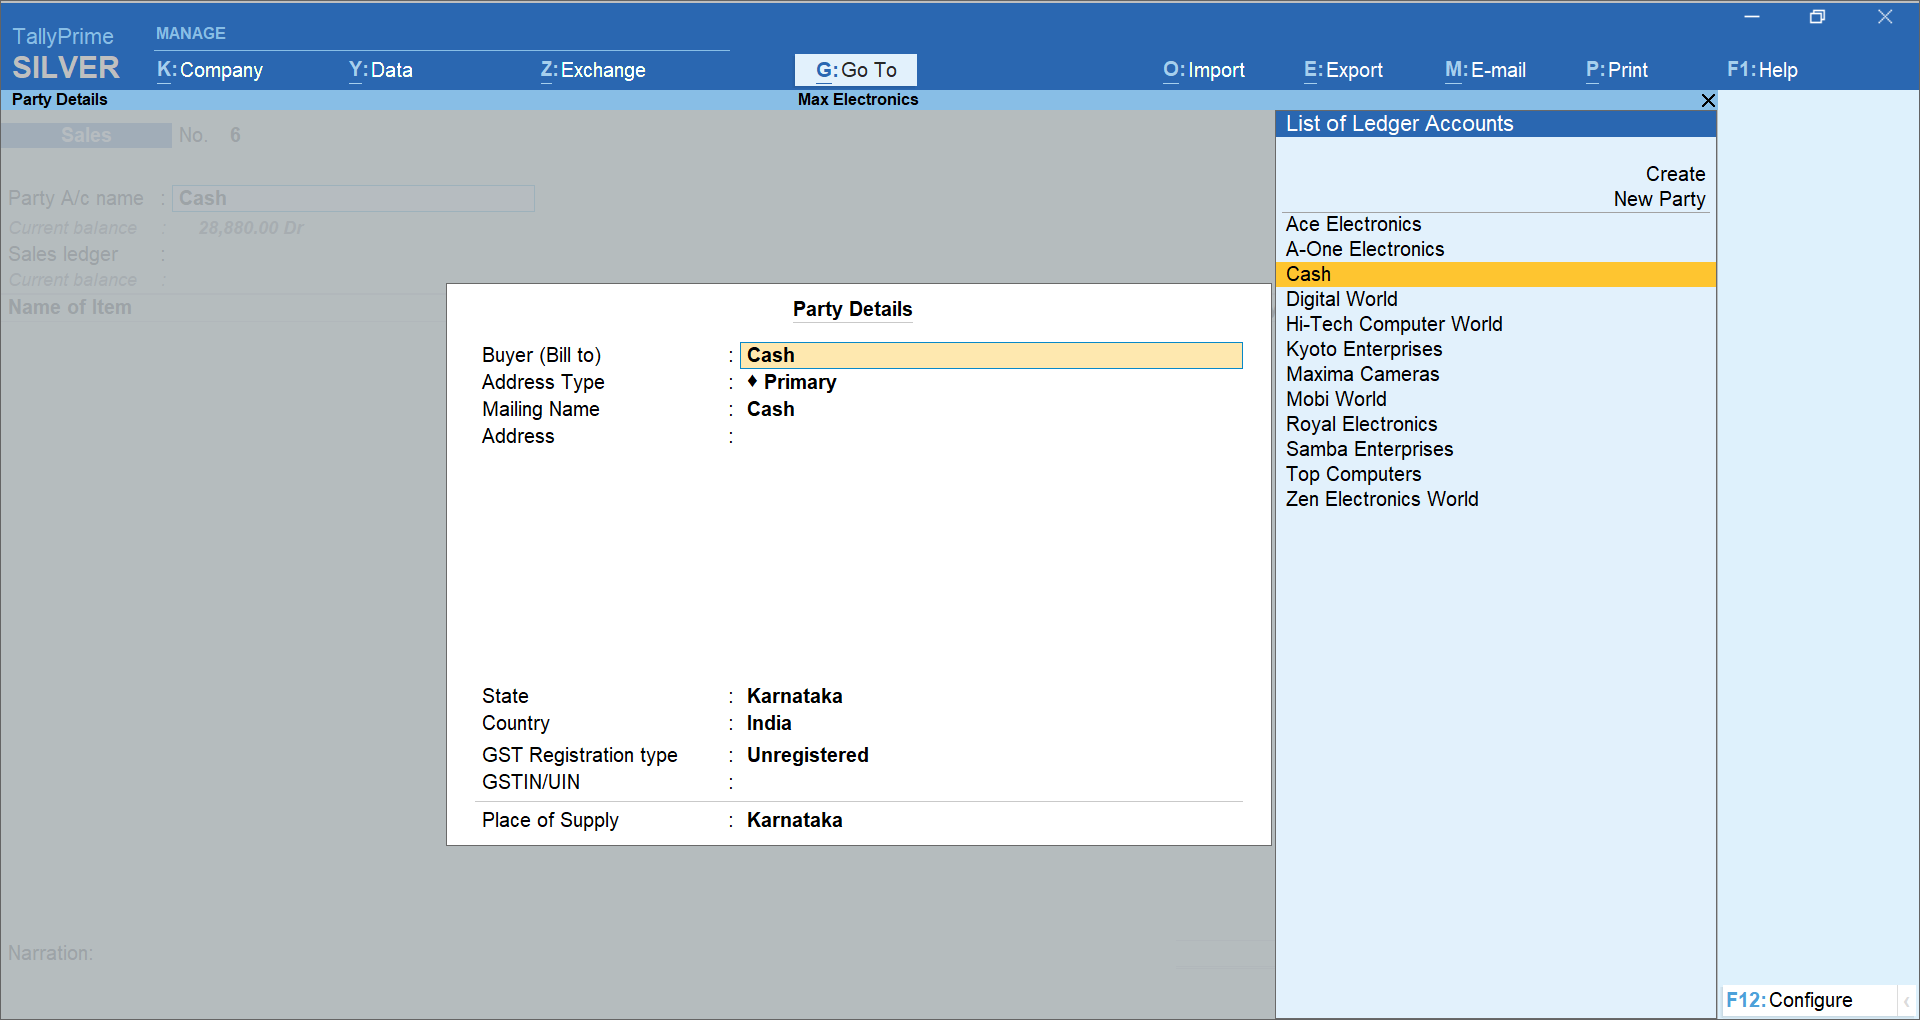
- Option -1: If party ledger is created with PAN details
In the buyer's details screen (supplementary screen), select the party ledger.
- Option -2: If party ledger is not available
You can either create a ledger and use it as mentioned in the above option. Else, you can manually add PAN as part of address details under the buyers' details screen (supplementary screen)
Read more:


