A company in TallyPrime is a book in which all the financial transactions of a company are recorded. In simple words, it’s just like how you create a book for recording your business transactions, you need to create a company to record the transactions in TallyPrime.
If you have just brought or moved to TallyPrime, company creation is the first step after you have installed and activated TallyPrime license. Before you start with company creation, here is a quick tip that will be useful for navigating to different fields that you see on the screen.
- “Enter” key to navigate down or forward
- “Backspace” key to navigate up or backwards
Don’t miss out to watch the video on how to create a company in TallyPrime.
How to Create a company in TallyPrime?
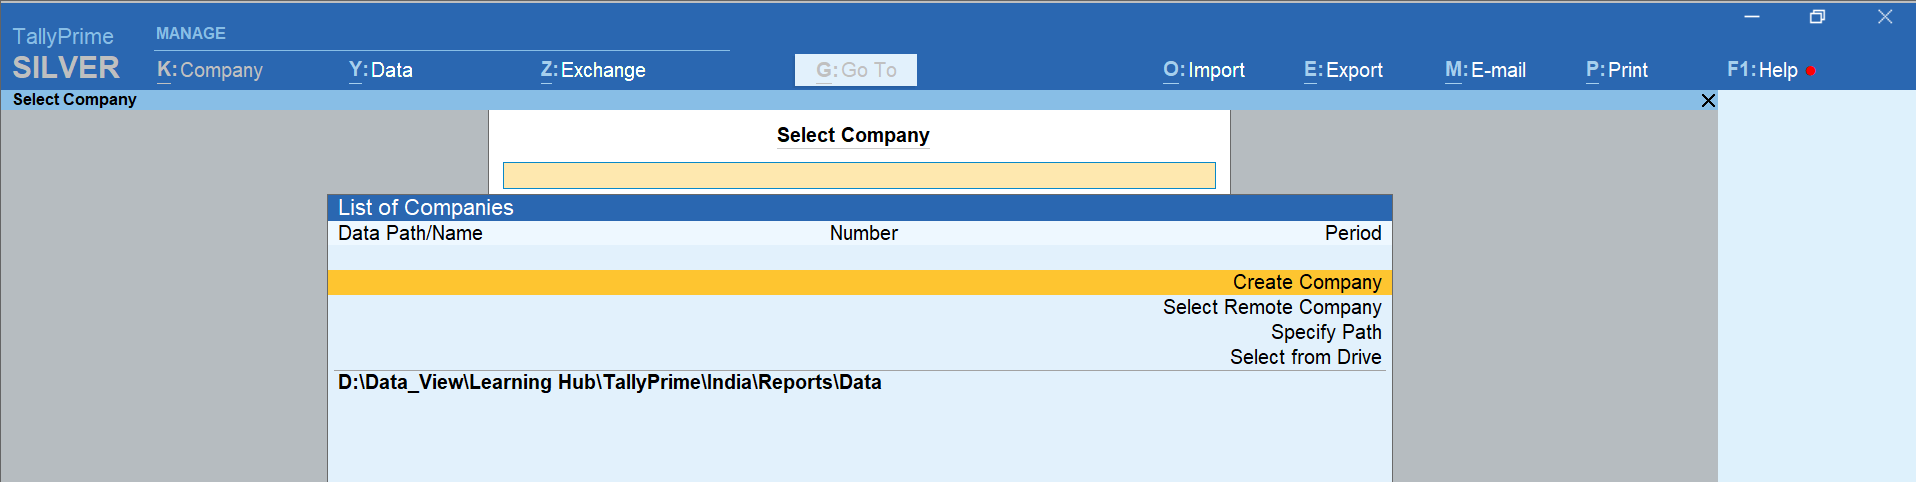
Below are the steps to create a company in TallyPrime.
- To being with, press “Enter” on “Create Company”
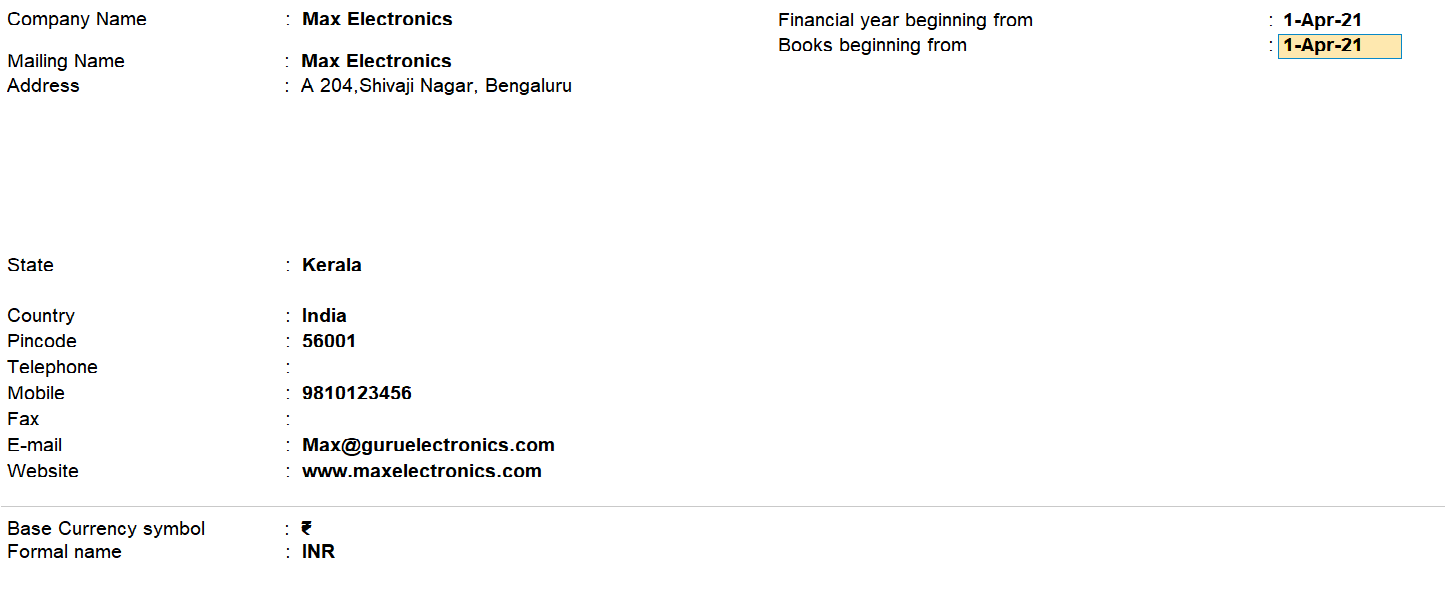
- Type the name of your company. For example, “Max Electronics”
- Type your address and select your state or province
- Country will be selected automatically
- Type your Pin code
- Mention the contact details of your company
- Next, specify the financial year from which you want to maintain your books in TallyPrime
- If you wish to add more details, press F12 for configure and enable options as required. You can enable “Use User Access Control” to set password for company data as well as to manage user roles & logins. Press “Enter” to accept the configurations
- Move to the last field on the screen. You will get a message asking whether you would like to accept the settings. Press “Y” to accept and “N” to continue editing the screen

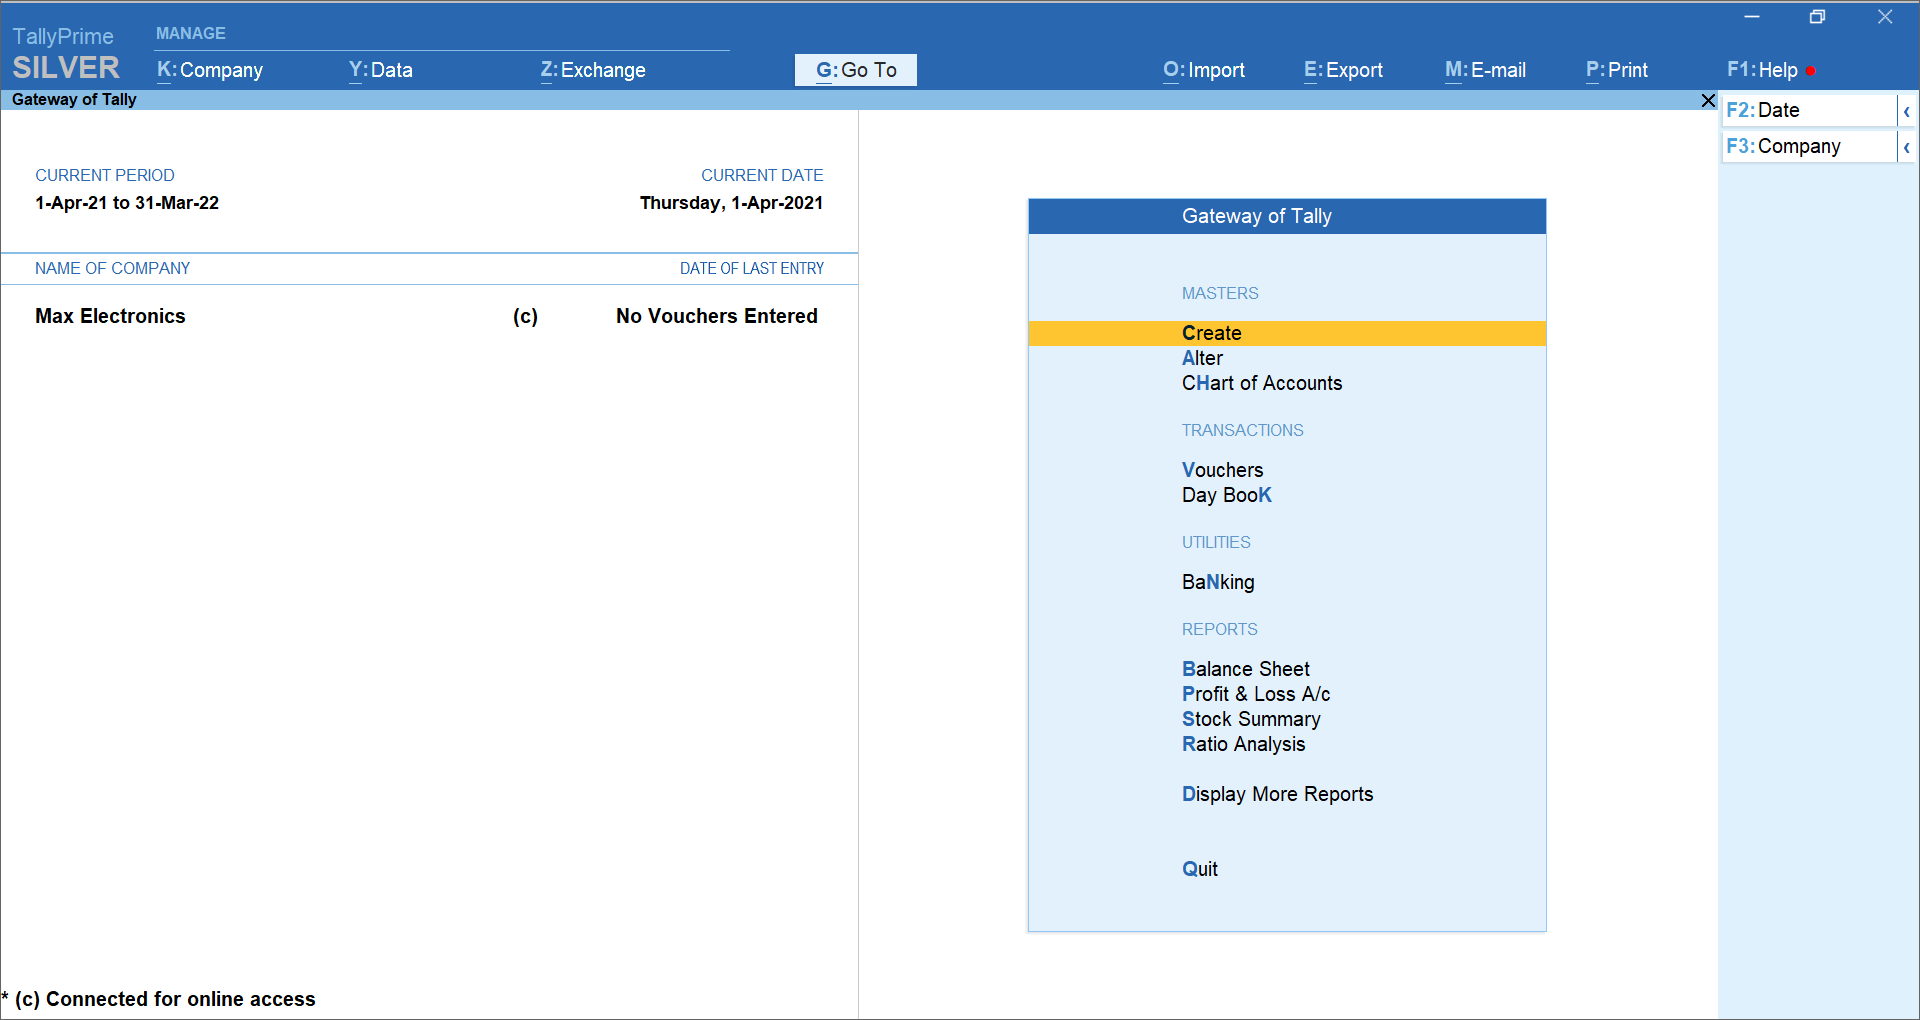
- Done! Your company is created
Configure company features in TallyPrime
Next, you will be asked to set the features that are required to manage your books. To see advanced features, set ‘Show more features’ to Yes
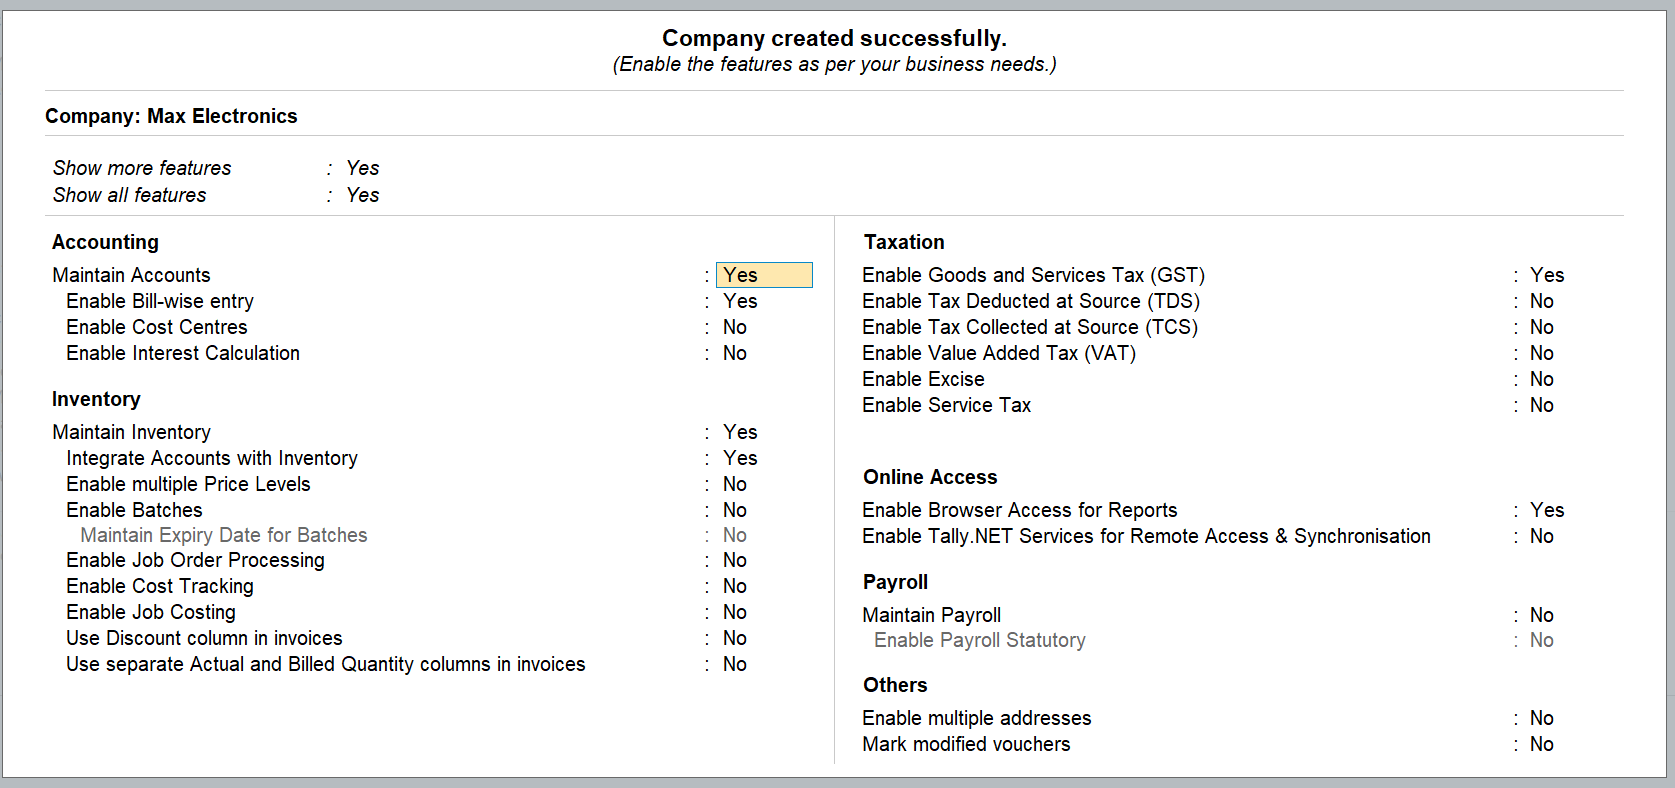
- Set ‘Yes’ to features that are required. You can do it anytime by navigating to the features screen by pressing F11 for features
- Move to the last field on the screen and Press ‘Y’ to accept the screen. Now, you are now ready to record transactions
Video guide on how to create company in TallyPrime?