Whether it’s sales or payment, maintaining the transactions and records with unique numbers is a common practice. When it comes to sales, the voucher number, commonly known as 'Invoice Number' is crucial for various critical reasons.
In TallyPrime, every transaction is automatically assigned a unique voucher number, helping you to manage and track the transaction easily. Given that needs vary from business to business, TallyPrime comes with a range of numbering methods such as 'automatic’ 'manual, 'auto-manual (hybrid)', and many more. These are not something new, but we have introduced it decades ago.
With Release 3.0, the latest release of TallyPrime, voucher numbering capabilities has become even more flexible, allowing businesses to manage the range of situations they may encounter.
Let's look at new voucher numbering capabilities introduced in TallyPrime Release 3.0.
Flexible voucher numbering capabilities for accurate recordkeeping
Retain the original number
Sometimes, you might have missed recording a transaction and notice it after a few days. Now you want to insert it. A transaction is recorded wrongly, and you want to delete it. While there are plenty of reasons, it is important to keep the voucher number of already recorded transactions intact.
With TallyPrime Release 3.0, the automatic method of voucher numbering is now enhanced to have an auto-retain voucher numbering system during insertion or deletion. This means once an invoice is generated, the number assigned is permanent in nature. When an invoice is inserted, it is assigned with a new number without affecting the already generated invoice. It's the same when you delete the transaction i.e., the number is removed without affecting the already generated invoice.
Just in case, if want the voucher number of transactions recorded earlier to be re-numbered when vouchers are inserted or deleted, you always have flexibility by doing a simple one-time configuration.
Un-used voucher number
For several reasons, the deletion of transactions is common practice. As mentioned, with the latest release of TallyPrime, when the transactions are deleted, the voucher is deleted without affecting the already recorded transactions. The best part is that you can track the deleted number and reuse based on the need.
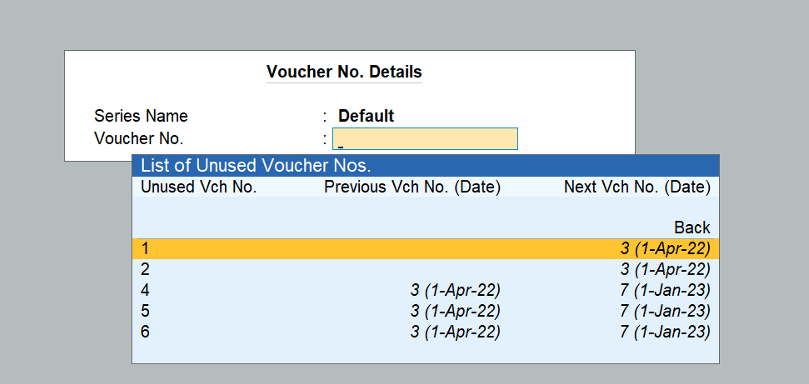
Let's say you have recorded 10 sales vouchers starting from 001 to 010. Now, the voucher number 006 is a duplicate, and you have deleted it. When the voucher is deleted, the rest of vouchers (from 007 to 010) will not be affected by the delete action. Voucher number 006 can also be re-used based on the need.
Multiple voucher numbering series:
With TallyPrime Release 3.0, you can maintain multiple voucher numbering series for a single voucher type and maintain unique numbering. Let's say you want to generate a unique voucher numbering for all cash sales and a separate numbering for credit sales. Using TallyPrime Release 3.0, you create multiple voucher numbering series without creating separate voucher types.
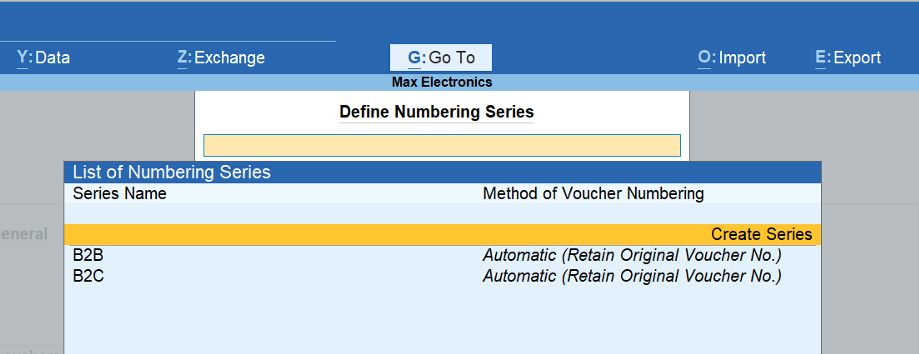
In the above example, you only need to create 2 separate voucher series such as 'Cash Sales Series' and ‘Credit Sales Series', under a single sales voucher type. Not just creation, you can toggle between the series while recording the voucher depending upon the transaction's nature. You will be able to do this for all the voucher types as per your business requirement.
What's more to look for in TallyPrime 3.0?
With the new version of our flagship product, TallyPrime 3.0, is set to enhance your business functions. With the all-new powerful report filter you can drive critical business decisions based on accurate analysis of your company.


