You can schedule an appointment for a business lead recorded earlier, this will help you in tracking the appointments and bring it to closure.
To schedule an appointment for an existing Lead follow the steps given:
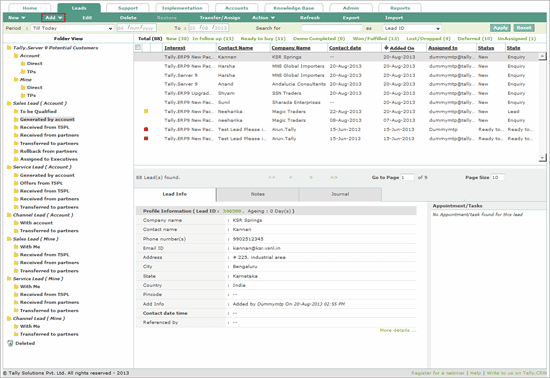
In Lead Listing screen,
Select the required lead from the list displayed.
Click Add.
Select Appointment.

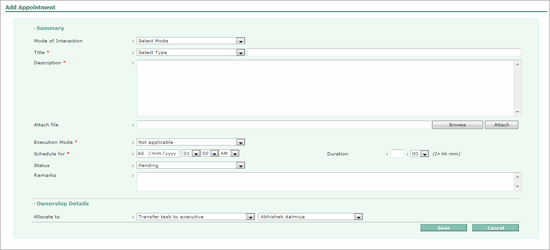
The Add Appointment form appears as shown.

In the Summary section,
Select the mode of contact with the customer in the Mode of Interaction field.
Select the required title from the drop down list in the Title field.
Enter a brief description about the title in the box provided. Further explanation can be filled up in the Description box.
To attach a file with details of the appointment, click Browse, select the required file and click Attach in the Attach file field.
Select the required Execution Mode from the execution mode drop down list,
Onsite - visit the location for a resolution.
Remote - access the customer's location from your office for resolution.
Set the required date and time in Schedule for.
Enter the duration of appointment in hours and minutes in the Duration field.
By default, the status is set to Pending for a fresh appointment.
Enter remarks, if any in the Remarks field.
In the Ownership Details,
Allocate the scheduled appointment to yourself by selecting Self or transfer it by selecting Transfer task to executive in the Allocate to field. On selecting Transfer task to executive, the system allows you to choose the Sales Executive or Sales Manager.
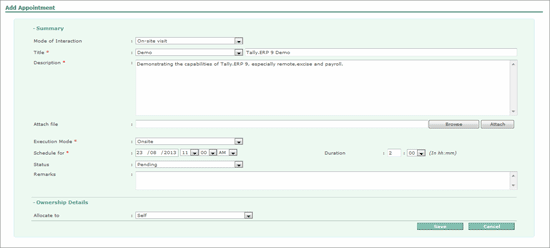
The completed Add Appointment form appears as shown:

Click Save to add the Appointment.
A success message is displayed, click Finish and Close the window.

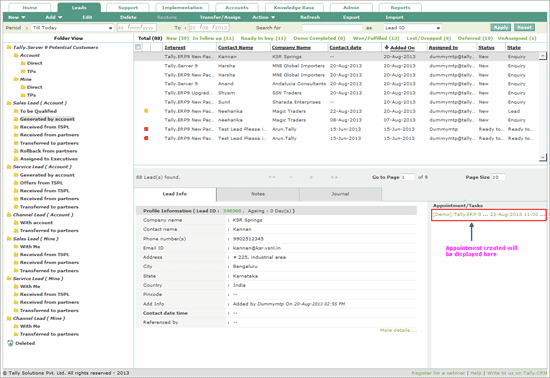
The lead list is updated and the appointment for the respective lead appears in Appointment/Tasks pane.

Note: Similarly, you can add a task/notes for a Lead.