A new lead is a business opportunity which comes to you in any one of the forms mentioned below:
Telephonic call
Orally expressed by a known source
Provided by Tally Solutions or your MTP
Received from on field sales executives
You can record this business opportunity as a lead by following the steps given.
Click Leads tab
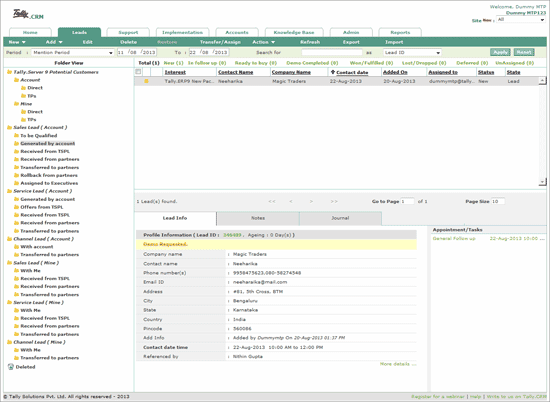
The Lead Management screen appears as shown:
Click New
Select Lead
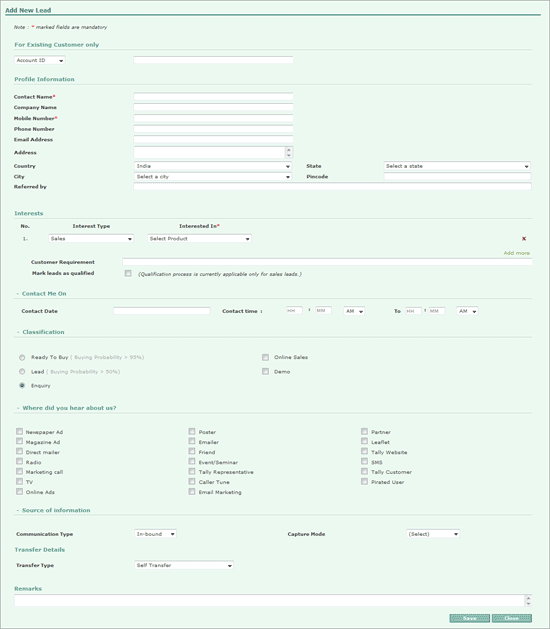
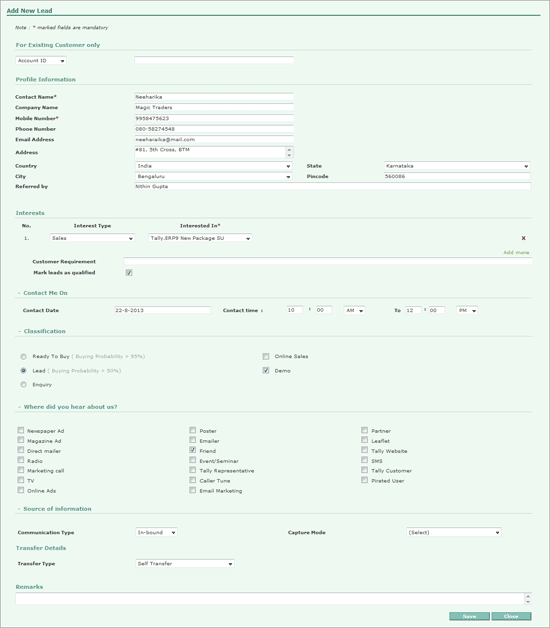
The Add New Lead form appears as shown:
In the For Existing Customers Only section
Enter the Serial Number/Account ID in case the business opportunity is for an existing customer.
For a prospective customer in the Profile Information section, provide the information as mentioned below:
Enter the name of the person to be contacted in Contact Name field.
Enter the name of the company in Company Name field.
Enter the mobile number of the contact person in Mobile Number field
Enter the telephone of the contact person in Phone Number field.
Enter the email address of the contact person or the company’s email address in Email Address.
Enter the postal address of the prospective customer in Address field.
Select the required country from the Country dropdown list.
Select the required state from the State dropdown list. The States list is displayed based on the selected Country.
Select the required city from the City dropdown list. The Cities list is displayed based on the selected State.
Type the pin code for the address in the Pincode field.
Enter the name of the person who had referred this prospect in the Referred by field.
In the Interests section:
Select Sales/Service/Channel in the Interest Type. This indicates that the prospective customer or client is interested to buy a product or get into a service such as maintenance or customization etc. or wants to become a partner.
Based on the Interest Type selected, the list of Products/Service/Channel Partner appears in the Interested In. Select the required Product/Service/Channel Partner from the drop down list provided.
In case the prospective customer is interested in another Product/Service/Partner click Add more to include another row add and fill the required details.
In Customer Requirement field, add details of specific features or capabilities that the customer is looking for in the product.
Select the Mark leads as Qualified check box to mark the lead as qualified if the lead is already validated and only action is required from partner end. This is done so that the customer/prospect doesn't receive multiple calls.
Note: In case Mark leads as Qualified check box is selected during new lead creation, then the lead is moved to Generated by account folder. If it is not selected, then the lead is moved to To be Qualified and Generated by account folders.
The leads not marked as qualified are denoted with NQ as shown:
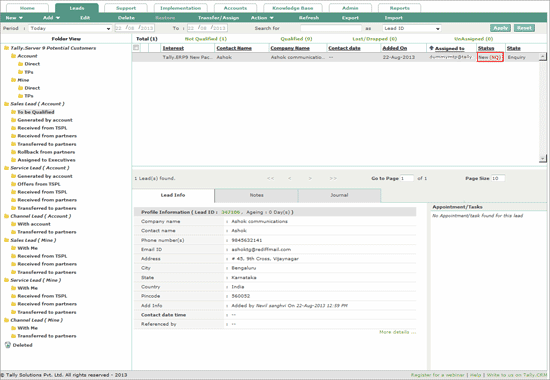
Unqualified leads can be marked as qualified by using the option Mark as Qualified under Actions.
In the Contact Me On section:
In the Contact Date field, select the required date from the date picker on which the prospective customer needs to be contacted.
Select the exact time during which the prospective customer needs to be contacted in Contact time field.
Note: When a contact date and time is entered for a new lead, an appointment is automatically created for given time. The appointment details are displayed in the Appointment/Task panel in the lead listing screen.
In the Classification section:
Choose the appropriate option from Ready to Buy/Lead/Enquiry based on the conversation with the prospective customer. Select both or either Online Sales/Demo check box based on customer requirement.
In Where did you hear about us? section:
Select the appropriate option(s) by clicking the check box.
In the Source of information section:
Choose the required option in the Communication Type drop down list.
In-bound – When prospective customer calls enquiring about the product or service.
Out-bound - When you make a cold call to the customer.
Select the mode of capture in the Capture Mode field. The options available are Email, Website, Telephone Call, Fax, SMS and Chat.
The leads that are being generated can be transferred to one self, an executive within the organisation or to a Tally Partner in case you are unable to fulfill the requirement.
Under Transfer Details section:
Select the required option i.e., Self Transfer or Transfer Lead to executive or Transfer Lead to partner, from the list.
Self Transfer
Select the option Self Transfer in the Transfer Type field, to transfer the lead to one self. On such transfer, the lead will be moved to With Me folder under the Sale Lead (Mine) section.
Transfer Lead to executive
Select the option Transfer Lead to executive in the Transfer Type field, to transfer the lead to a executive from your organisation.
In the Executive field, select the name of the executive. This field will be available only if the option Transfer Lead to executive is selected in the Transfer Type field
In the Select Site field, choose the site to which the executive belongs.
Transfer Lead to partner
Select the option Transfer Lead to partner in the Transfer Type field, to transfer the lead to another partner
In the Partner field, choose My TPs or Name or City or Pincode from the list. On selecting the option My TPs, the list of TPs attached to the partner will be displayed for selection. If either of the options - Name/City/Pincode is selected, then a search field opens. Enter the search keywords in this field to get a list of partners based on search criteria.
Select the required partner from the list.
When you transfer the lead directly from the new lead creation screen, MTP/TP to whom the lead is transferred is notified about the lead assigned to him by an SMS.
Enter the required message/questions/comments/concerns which the prospective customer has raised in the Remarks field.
Note: The fields marked with asterisk sign (*) are mandatory and require information.
The completed Add New Lead form appears as shown:
Click Save.
The successful message window appears as shown:

Click Add another lead to go back to Add New Lead form and enter details of a new lead or
Click Close window to close.
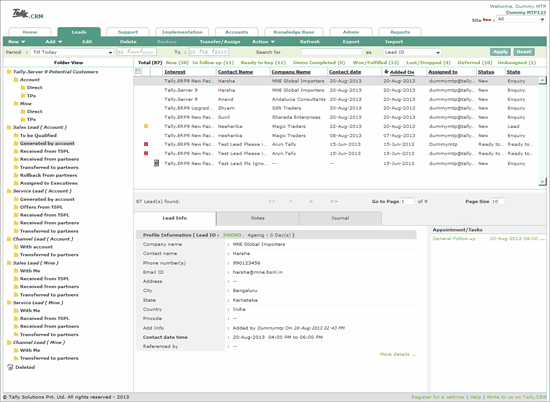
The lead is updated in the Lead list as shown:
