You can add a new task by following the steps given:
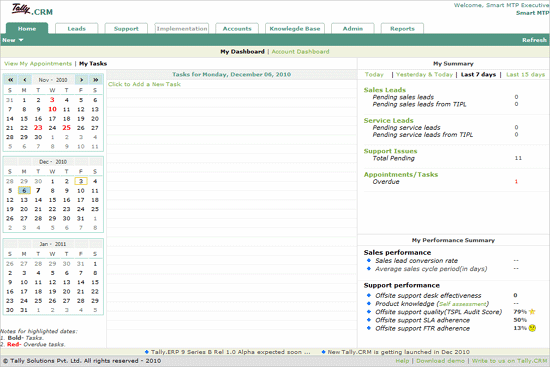
Click Tasks under My Calendar.
Click on the required date
The Tally.CRM screen appears as shown:

Click Add a New Task.
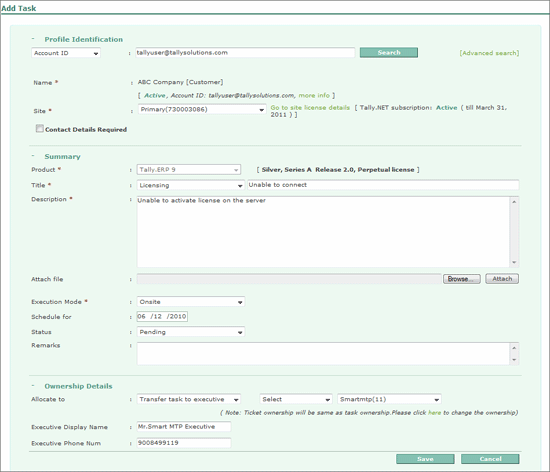
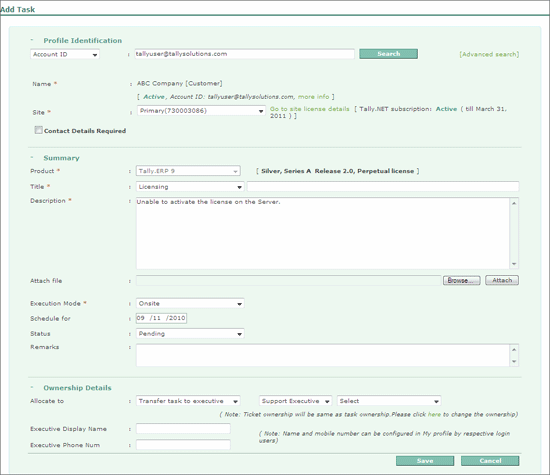
The Add Task form appears as shown:

In the Profile Identification section
Select the required Account ID/Email ID/Serial Number from the drop down list box
Based on the Account ID/Email ID/Serial Number selected enter the respective details in the field provided
Press Enter or click Search.
The Customer/Company Name and Site details are displayed in the Name and Site fields respectively.
In the Summary section
The Product name populated and displayed based on the Serial Number/E-Mail ID/Account ID provided.
Select the required Title from the drop down list displayed.
Enter a brief information about the title in the field provided
Enter the required description for the selected Title in the Description filed
In case you want to attaché some files to the task being created, click Browse select the required file and click Attach.
Select the required Execution Mode from the drop down list.
Click on the schedule date and select the required date from the date picker displayed in Schedule for.
By default the Status is set to pending.
Enter the required Remarks, if any
In the Ownership Details section
By default, Allocate to is set to Self, you can opt to transfer. Select the required option to allocate this task to the Service Partner or an Executive.
Transfer task to Executive: The executive’s Name, and Phone number will be displayed in case the same has been updated in My Profile available at the Login page.
Transfer task to Service Partner: Once this option is selected, mention the Account ID/Account Name/Email ID of the partner in the Transfer to field provided.
The completed Add Task form appears as shown:

Click Save
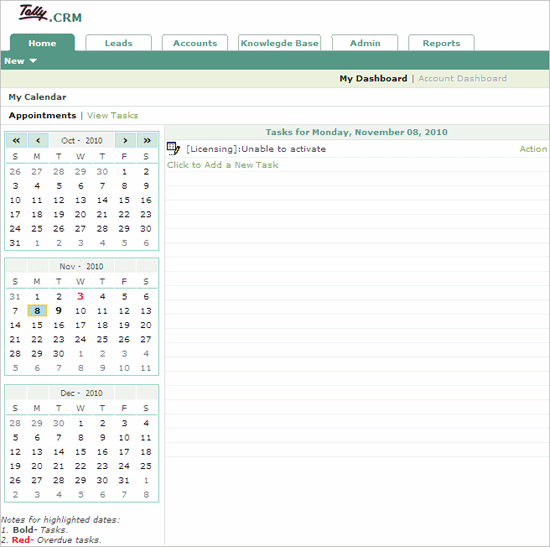
On successfully adding the task, the scheduled task is displayed as shown in the Tally.CRM screen
